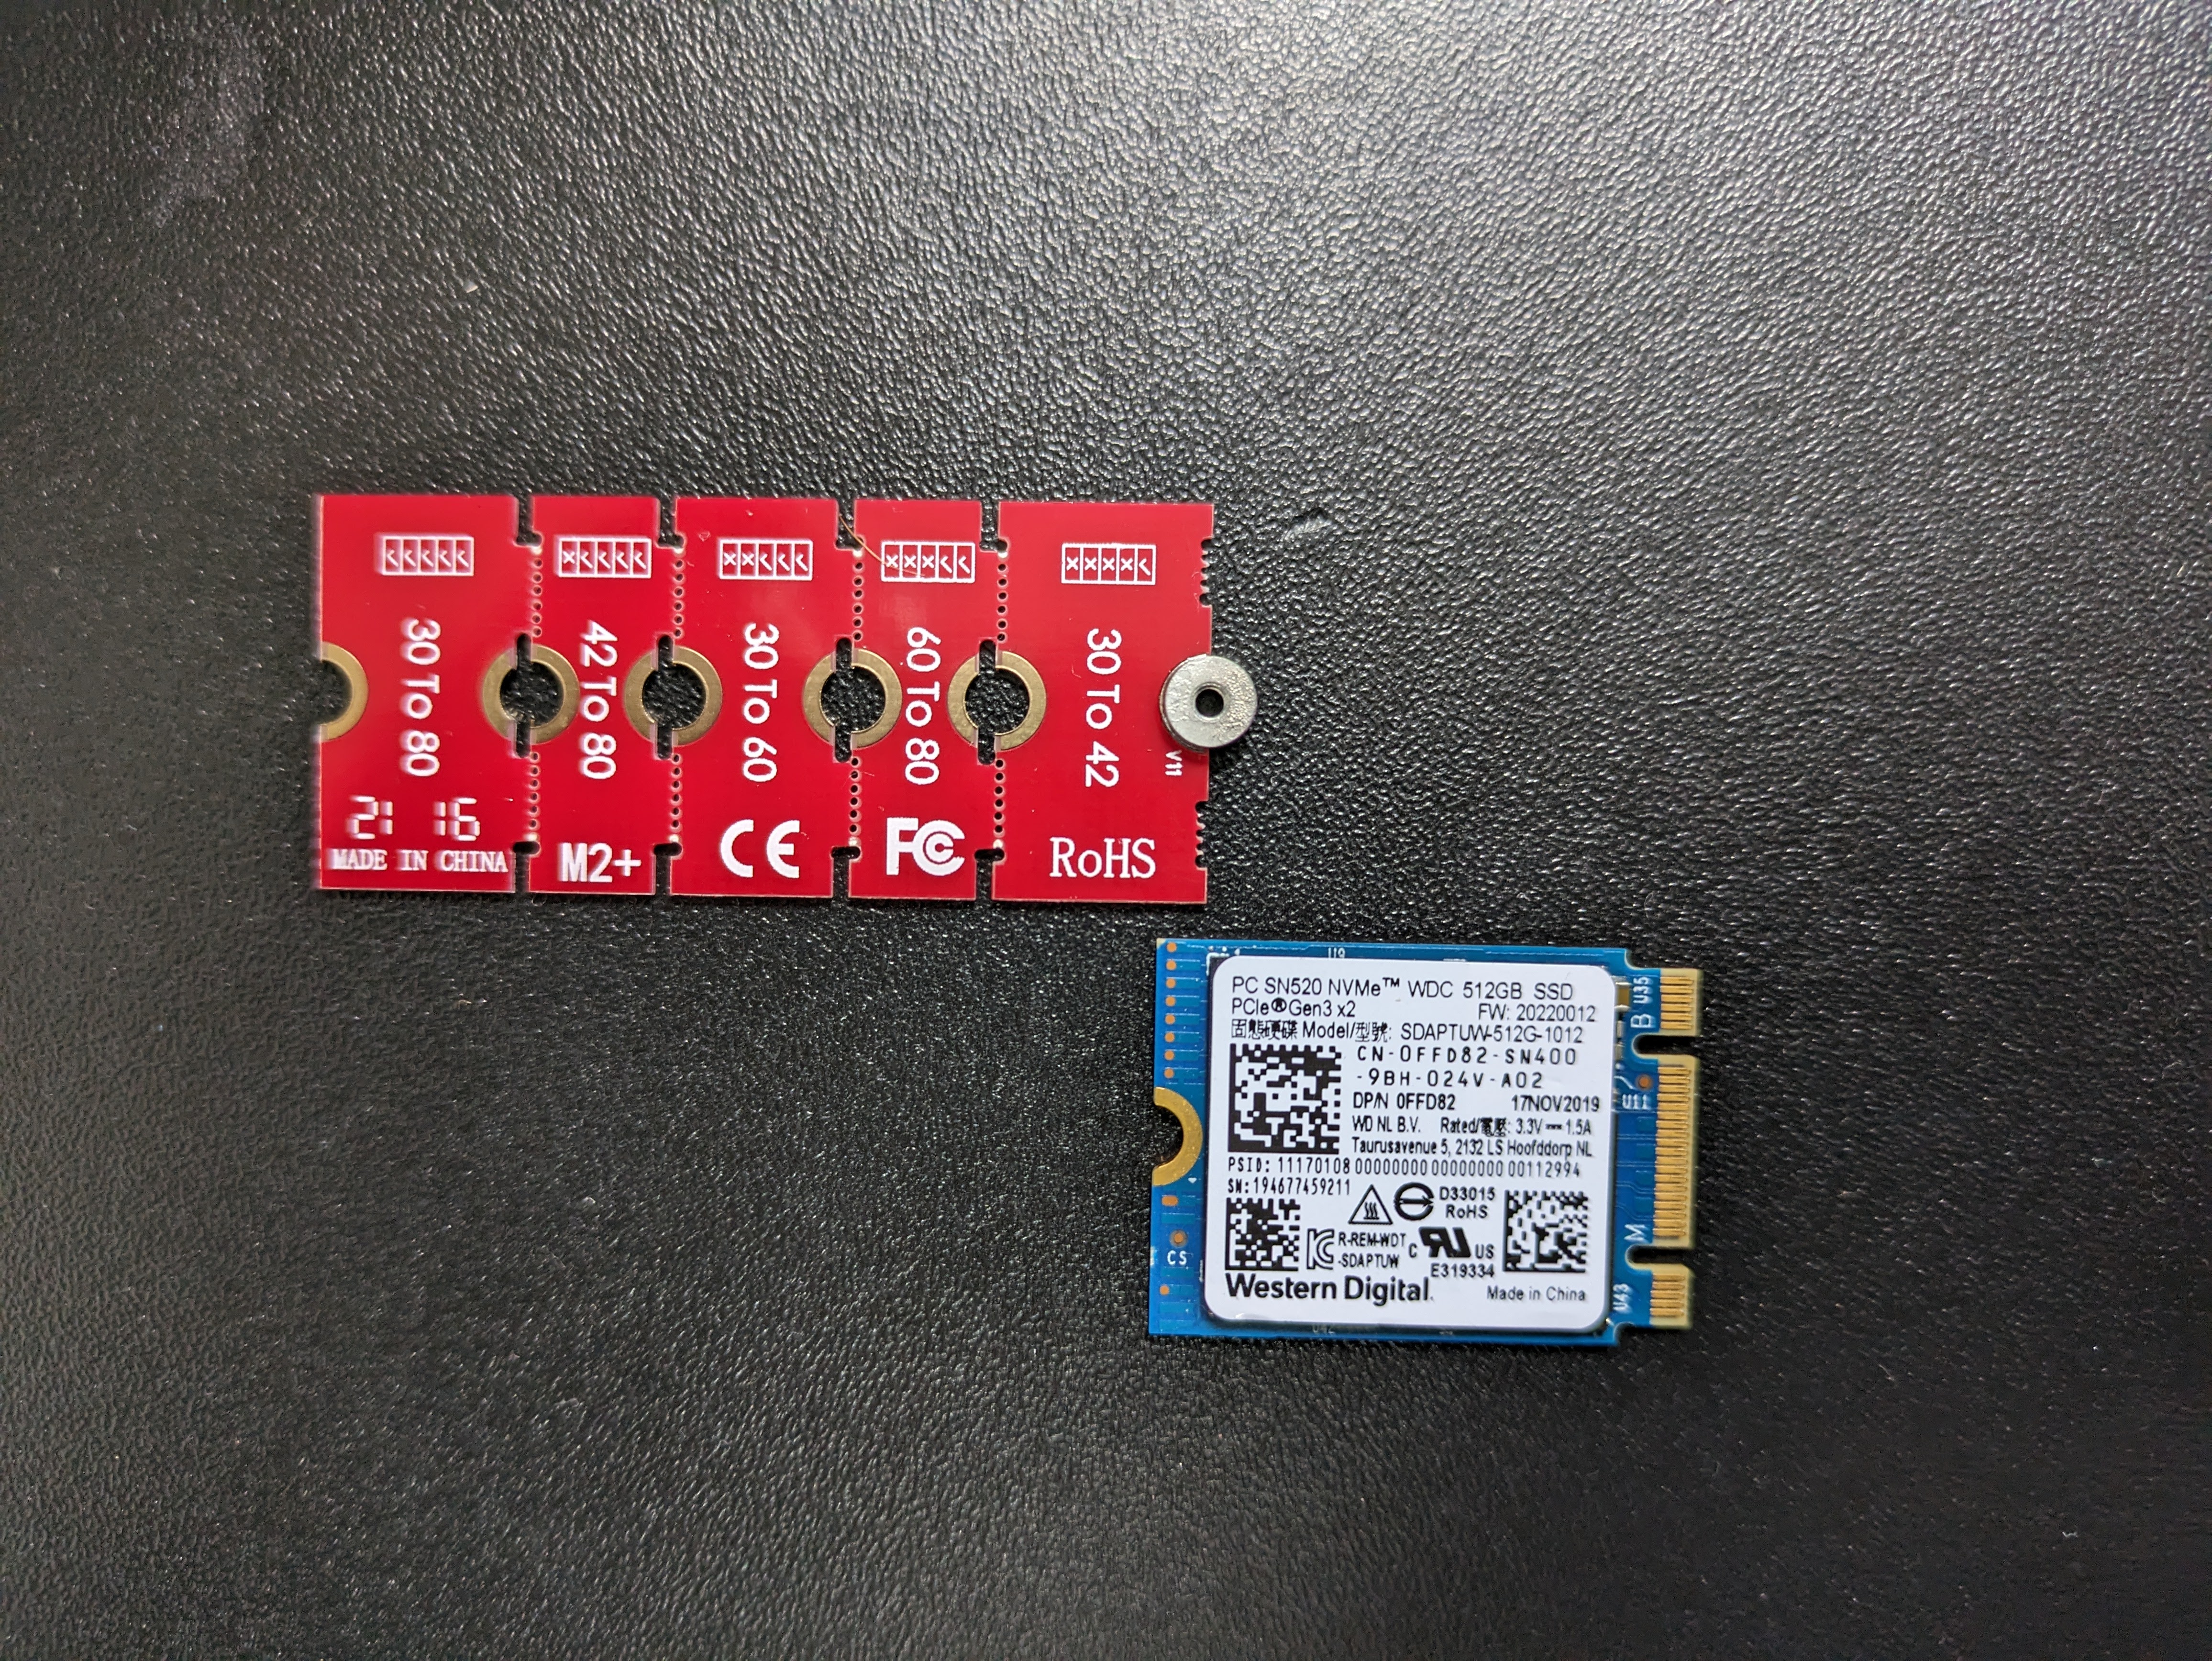
The ThinkPad T580 is a reliable and powerful laptop, but if you find yourself running out of storage space, or if you want to try out a different OS alongside your current one, upgrading with a second SSD is an excellent solution. However, 2242 NVME SSD’s are really hard to find, maybe due to the popularity of the T580 and T480 2242 NVME SSD’s and when you do find them they can be quite expensive. Using a 2230 and an extender you can get a larger capacity drive for cheaper than the 2242 alternatives.
So what do I mean by a 2230 vs a 2242 SSD? The last two digits, either 30 or 42 is the length of the SSD in mm, that’s it, it’s just to indicate the physical size.
In this guide, we’ll walk you through the step-by-step process of installing an additional SSD into your ThinkPad T580 using a 2230 SSD and an extender.
Disclaimer: Before proceeding with any hardware upgrade, please ensure you have a good understanding of computer hardware and are comfortable working with it. Additionally, remember that opening your laptop might void the warranty, so perform this upgrade at your own risk. If you’re unsure, it’s always best to seek assistance from a professional technician.
Find a compatible M.2 NVME SSD (B+M Key), the most popular one and the one I’ll be using here is the SN520. You’ll also need an extender which can be purchased for ~£4 or less from (eBay)[https://www.ebay.co.uk/itm/175778808550] or (Aliexpress)[https://www.aliexpress.com/item/4000337978004.html].
Disable the internal battery in the bios. To do this hit enter on start up and follow instructions to enter bios and disable internal battery*
Flip the laptop over, and remove the 2nd battery if you have one. Then remove the back cover from your laptop.
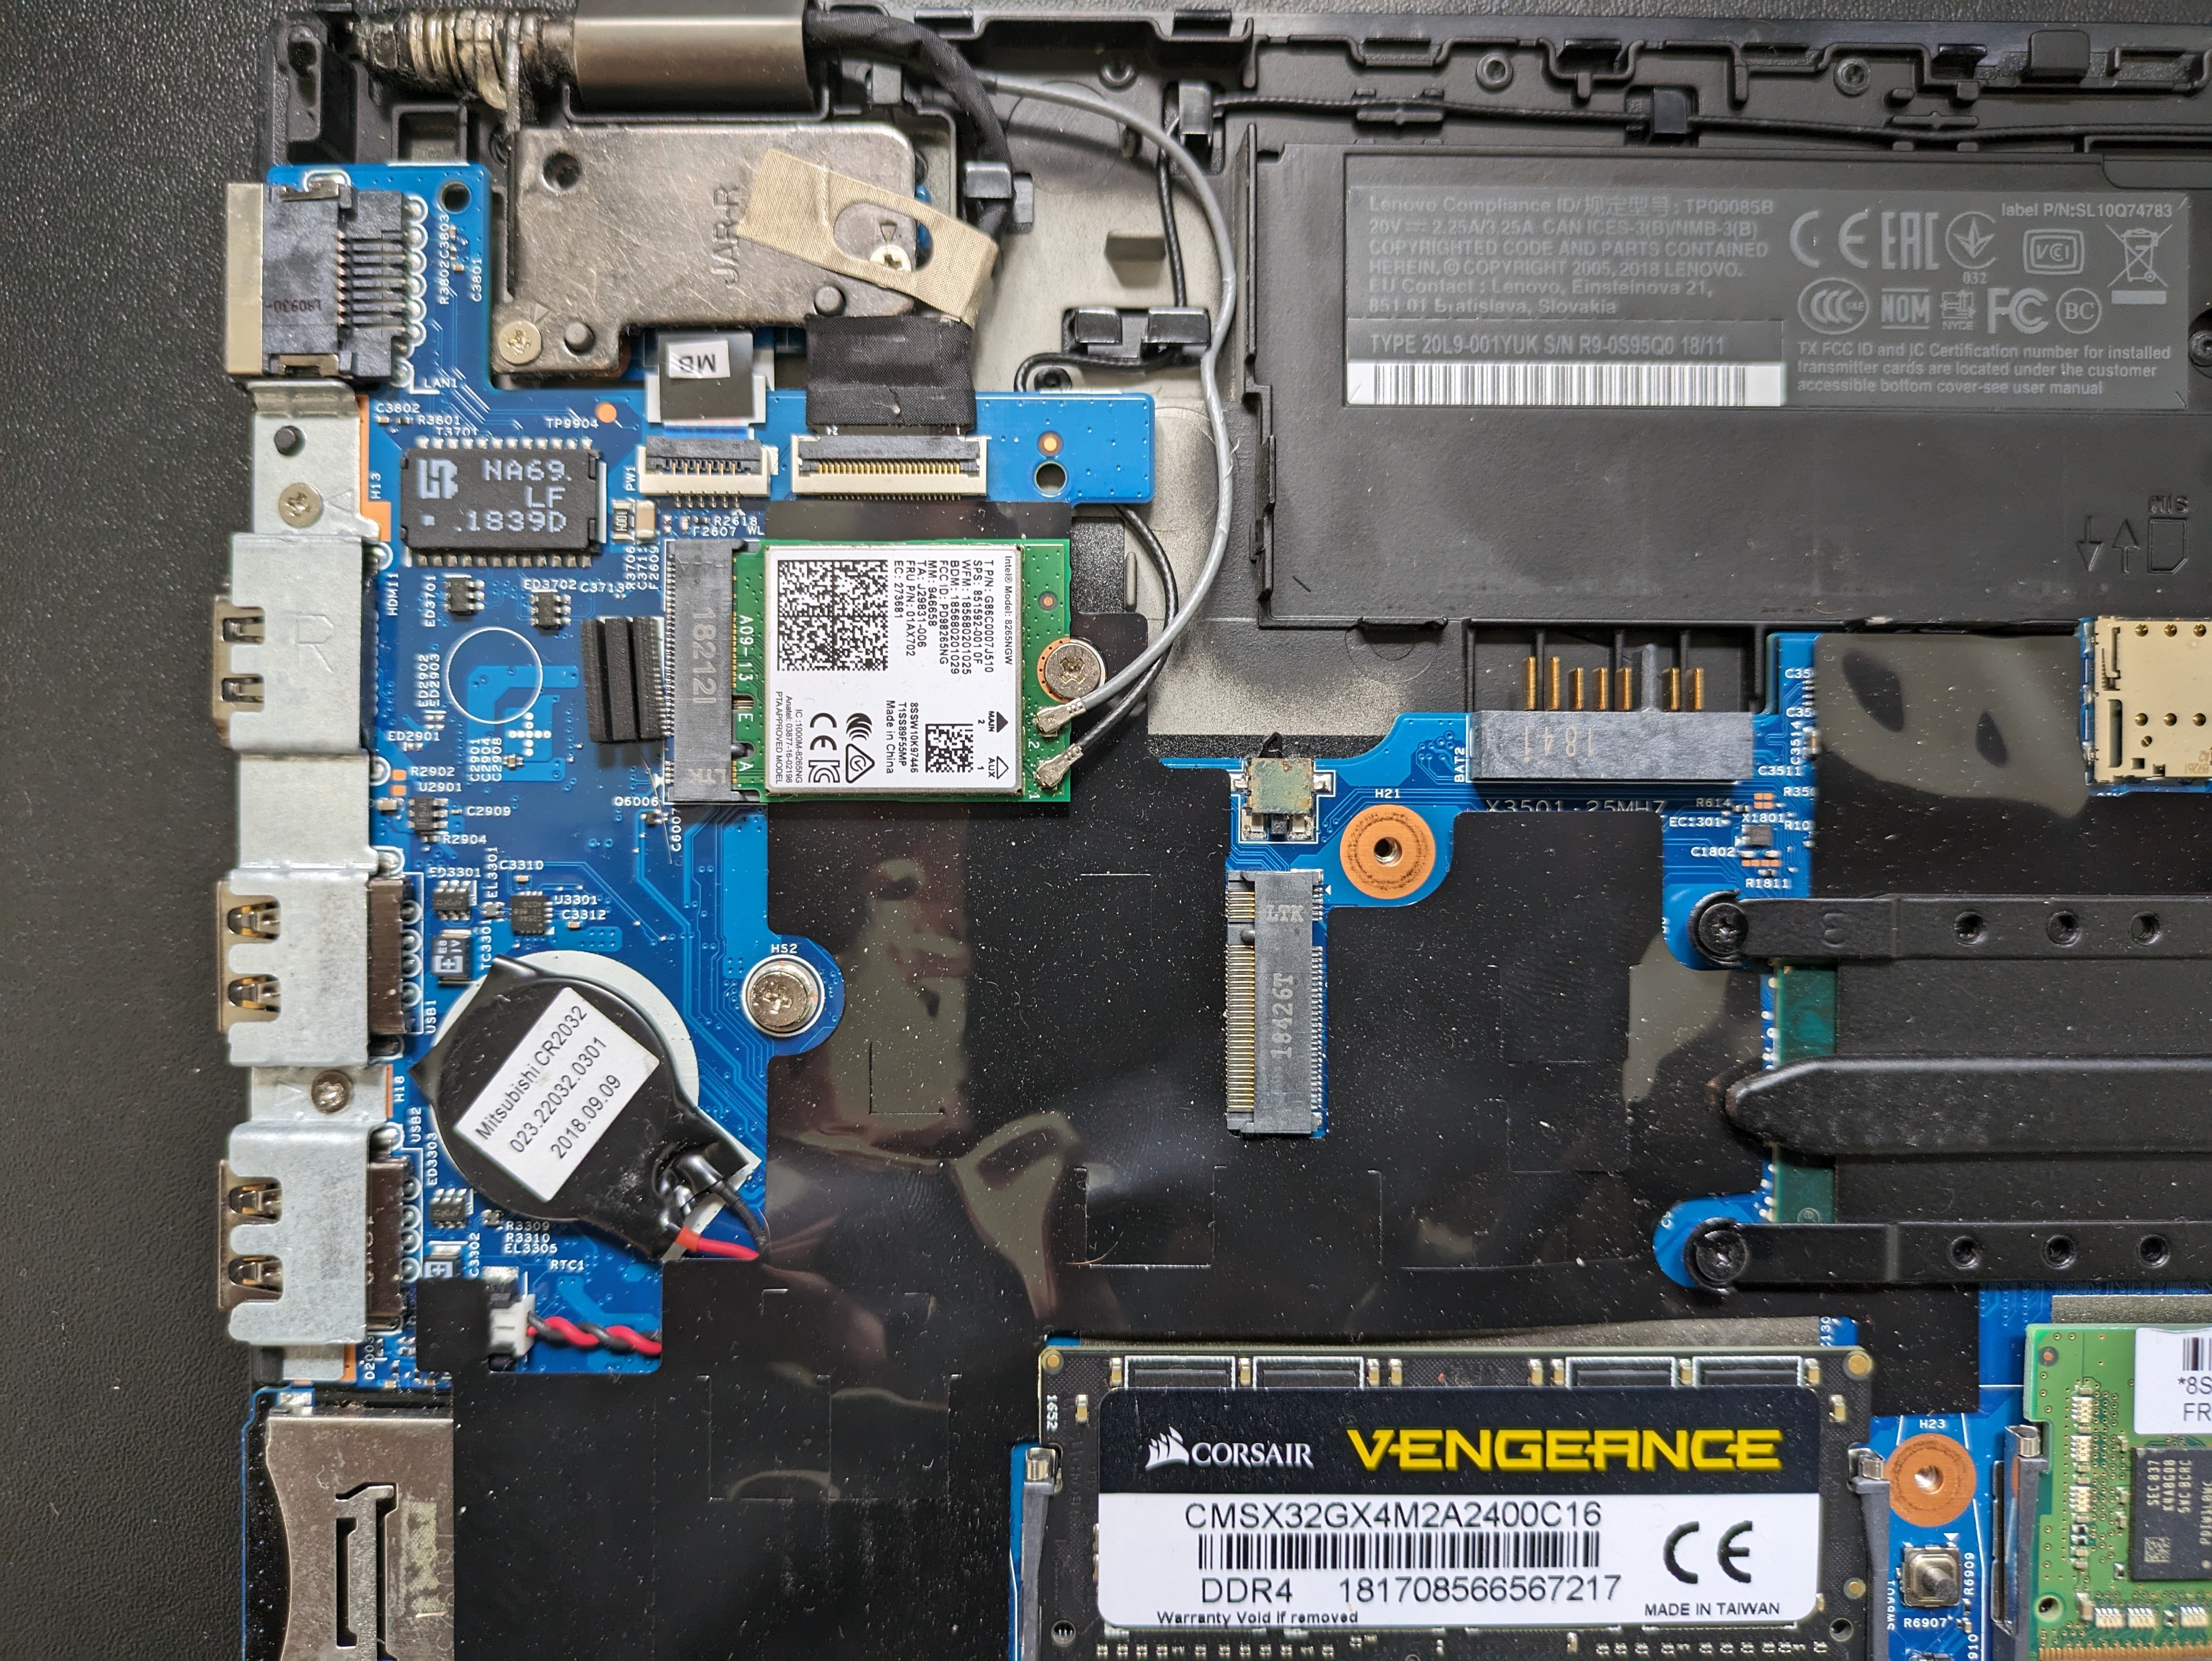
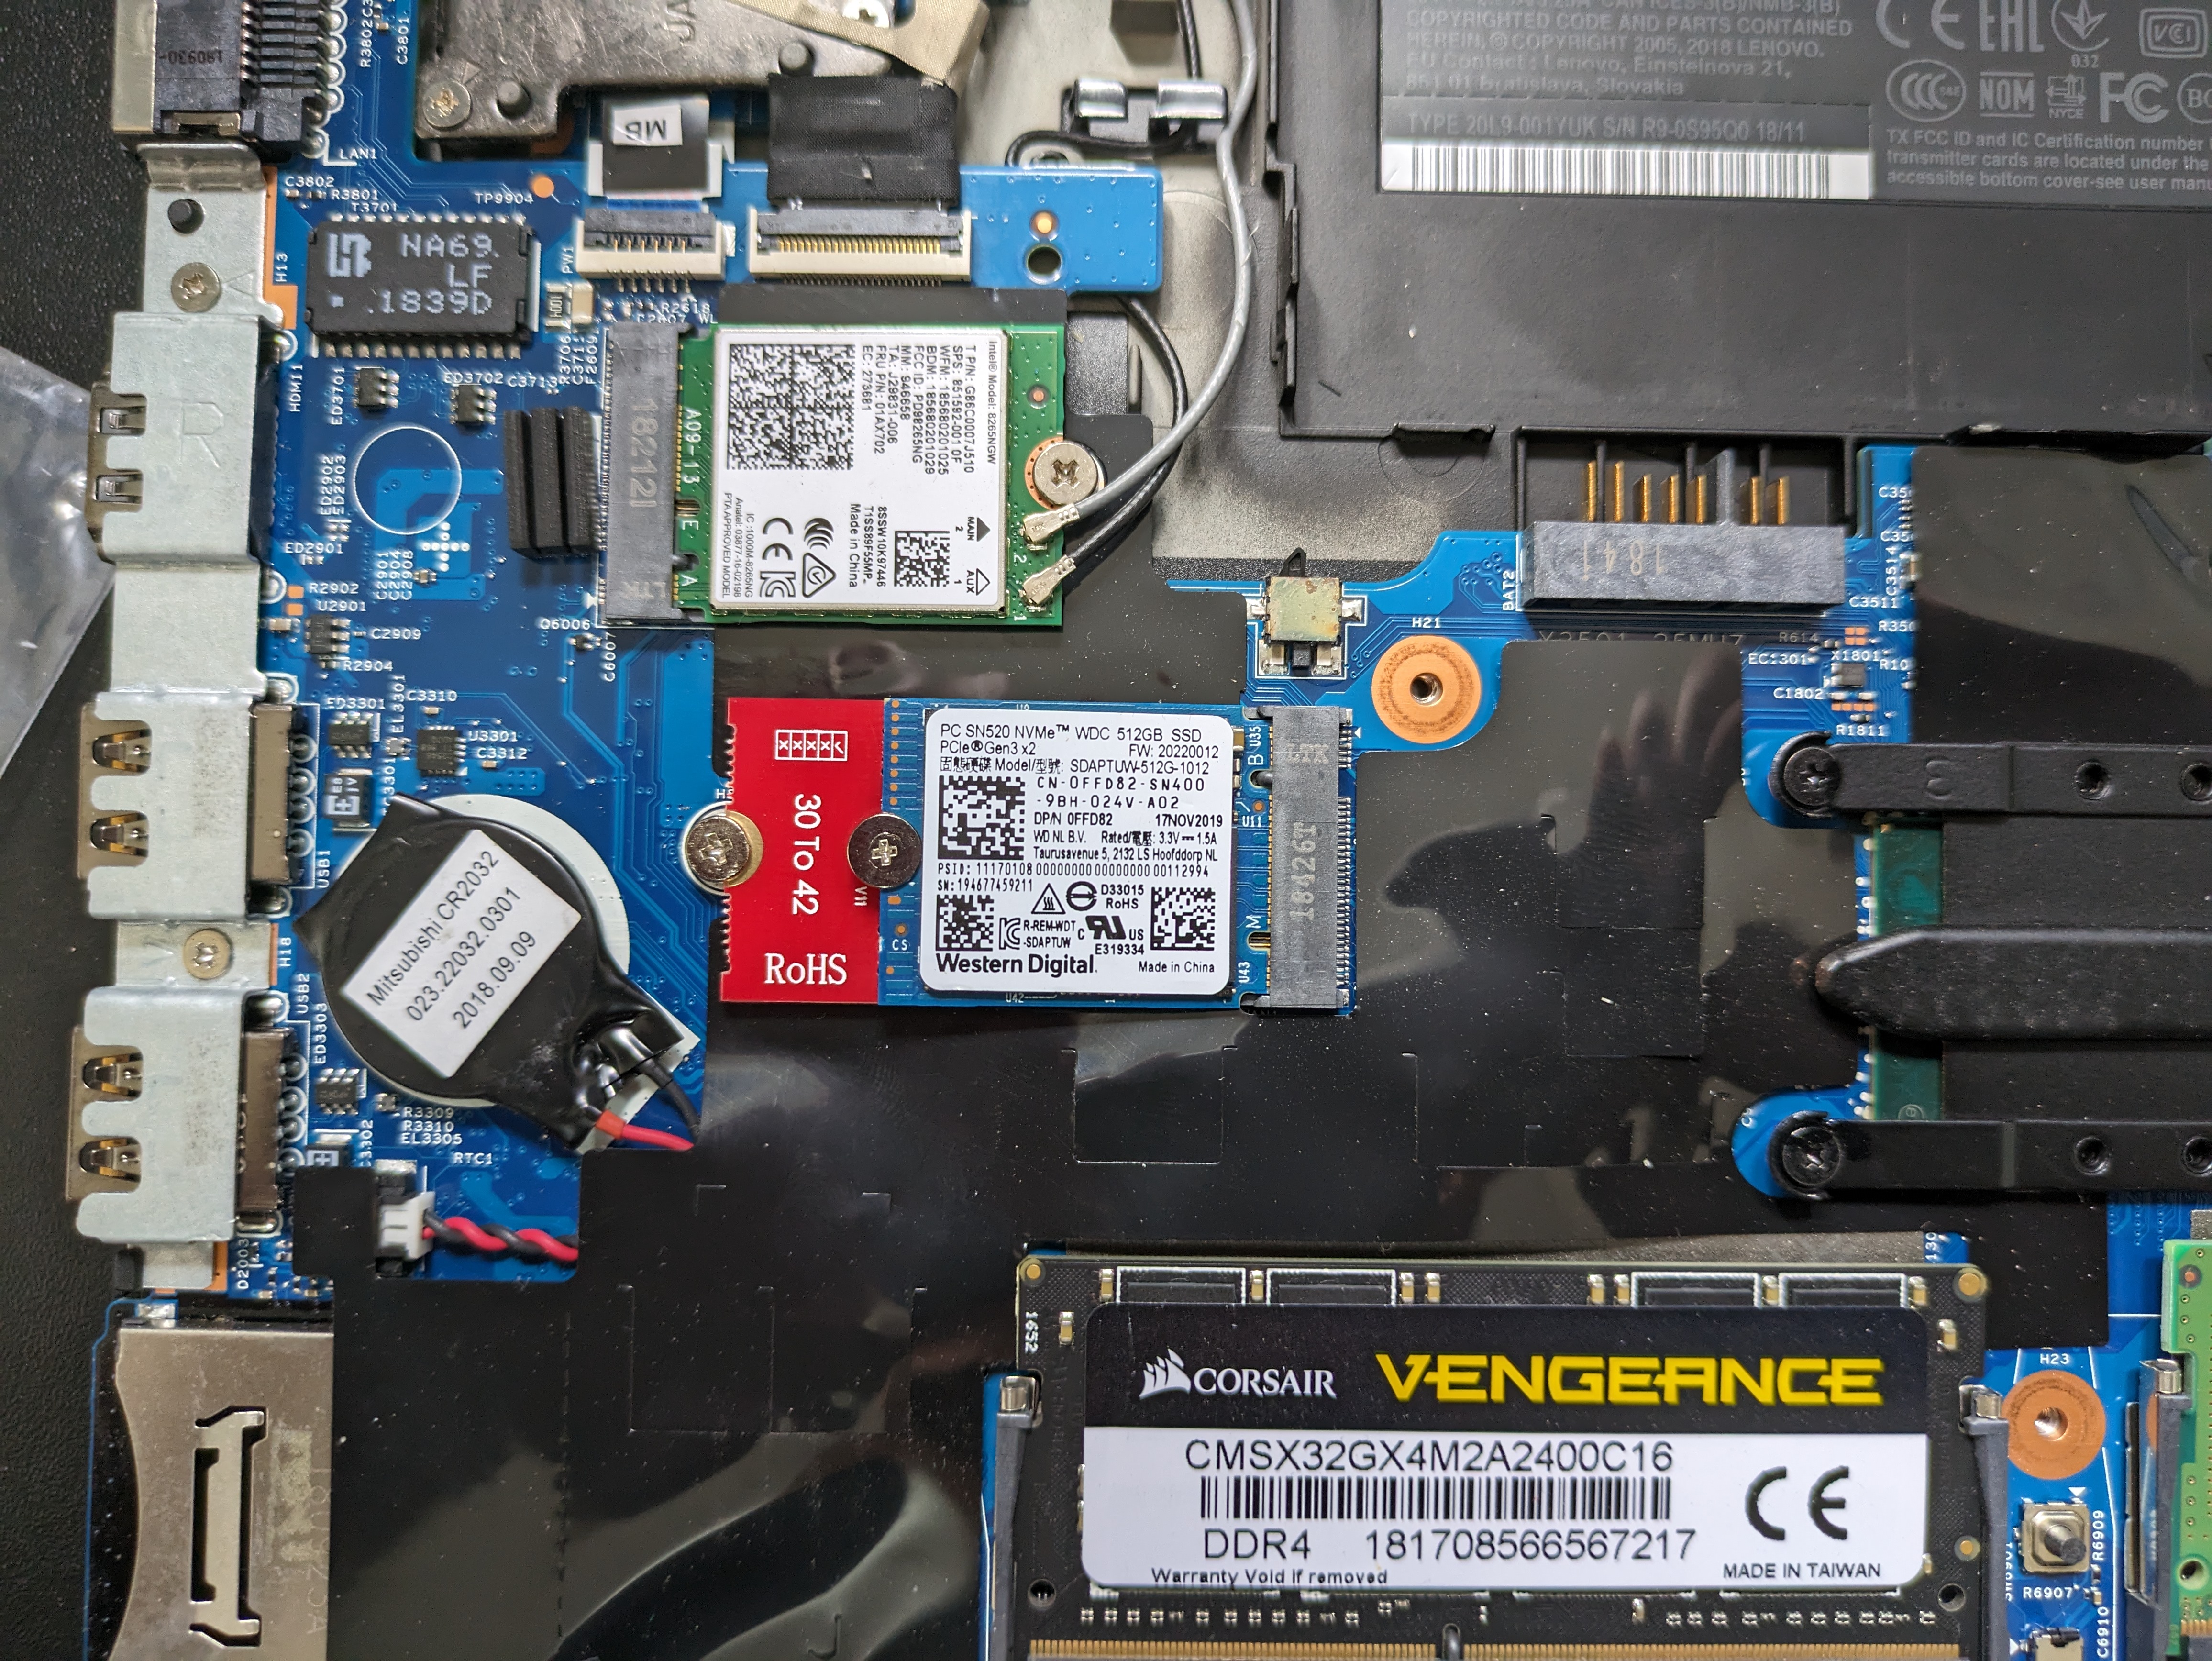
Identify the SSD slot, below images are for T580 so T480 may differ in appearance.
Connect the SSD and extender to accommodate the correct spacing. Below you can see both with and without the spacer and how the module extends the NVME SSD. The space does not actually add anything except ensure that the SSD connects securely to the laptop motherboard.
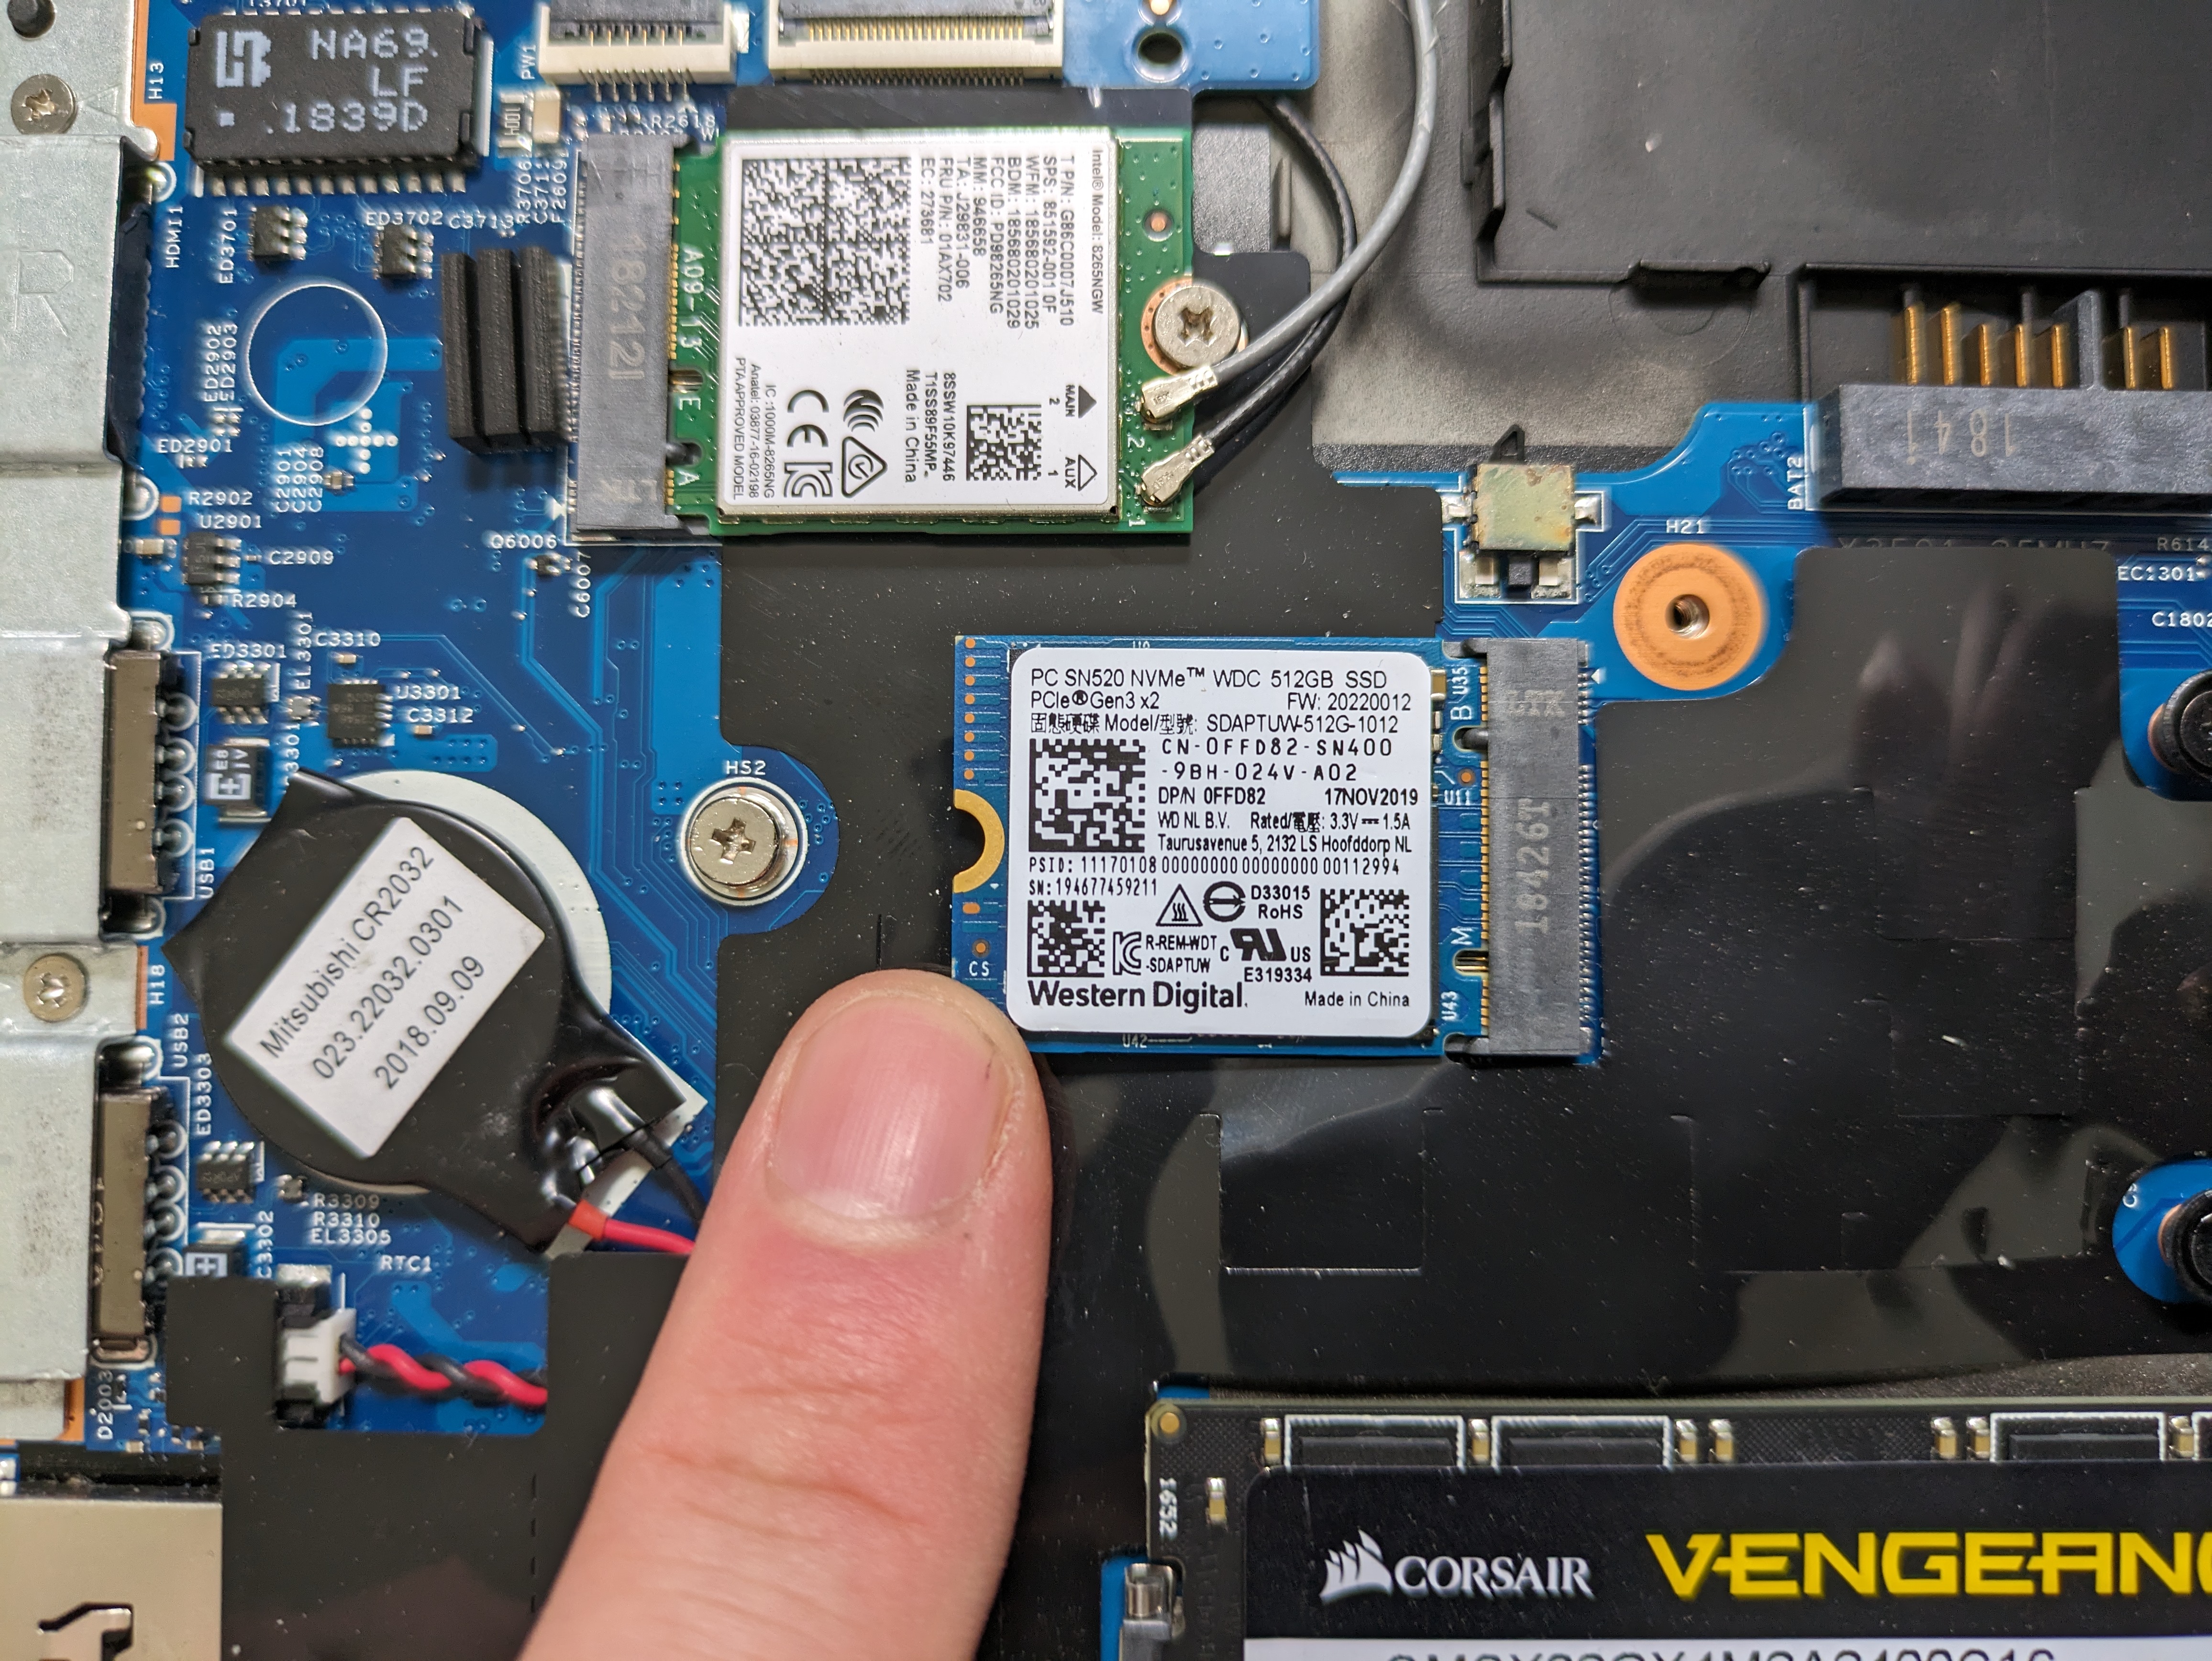
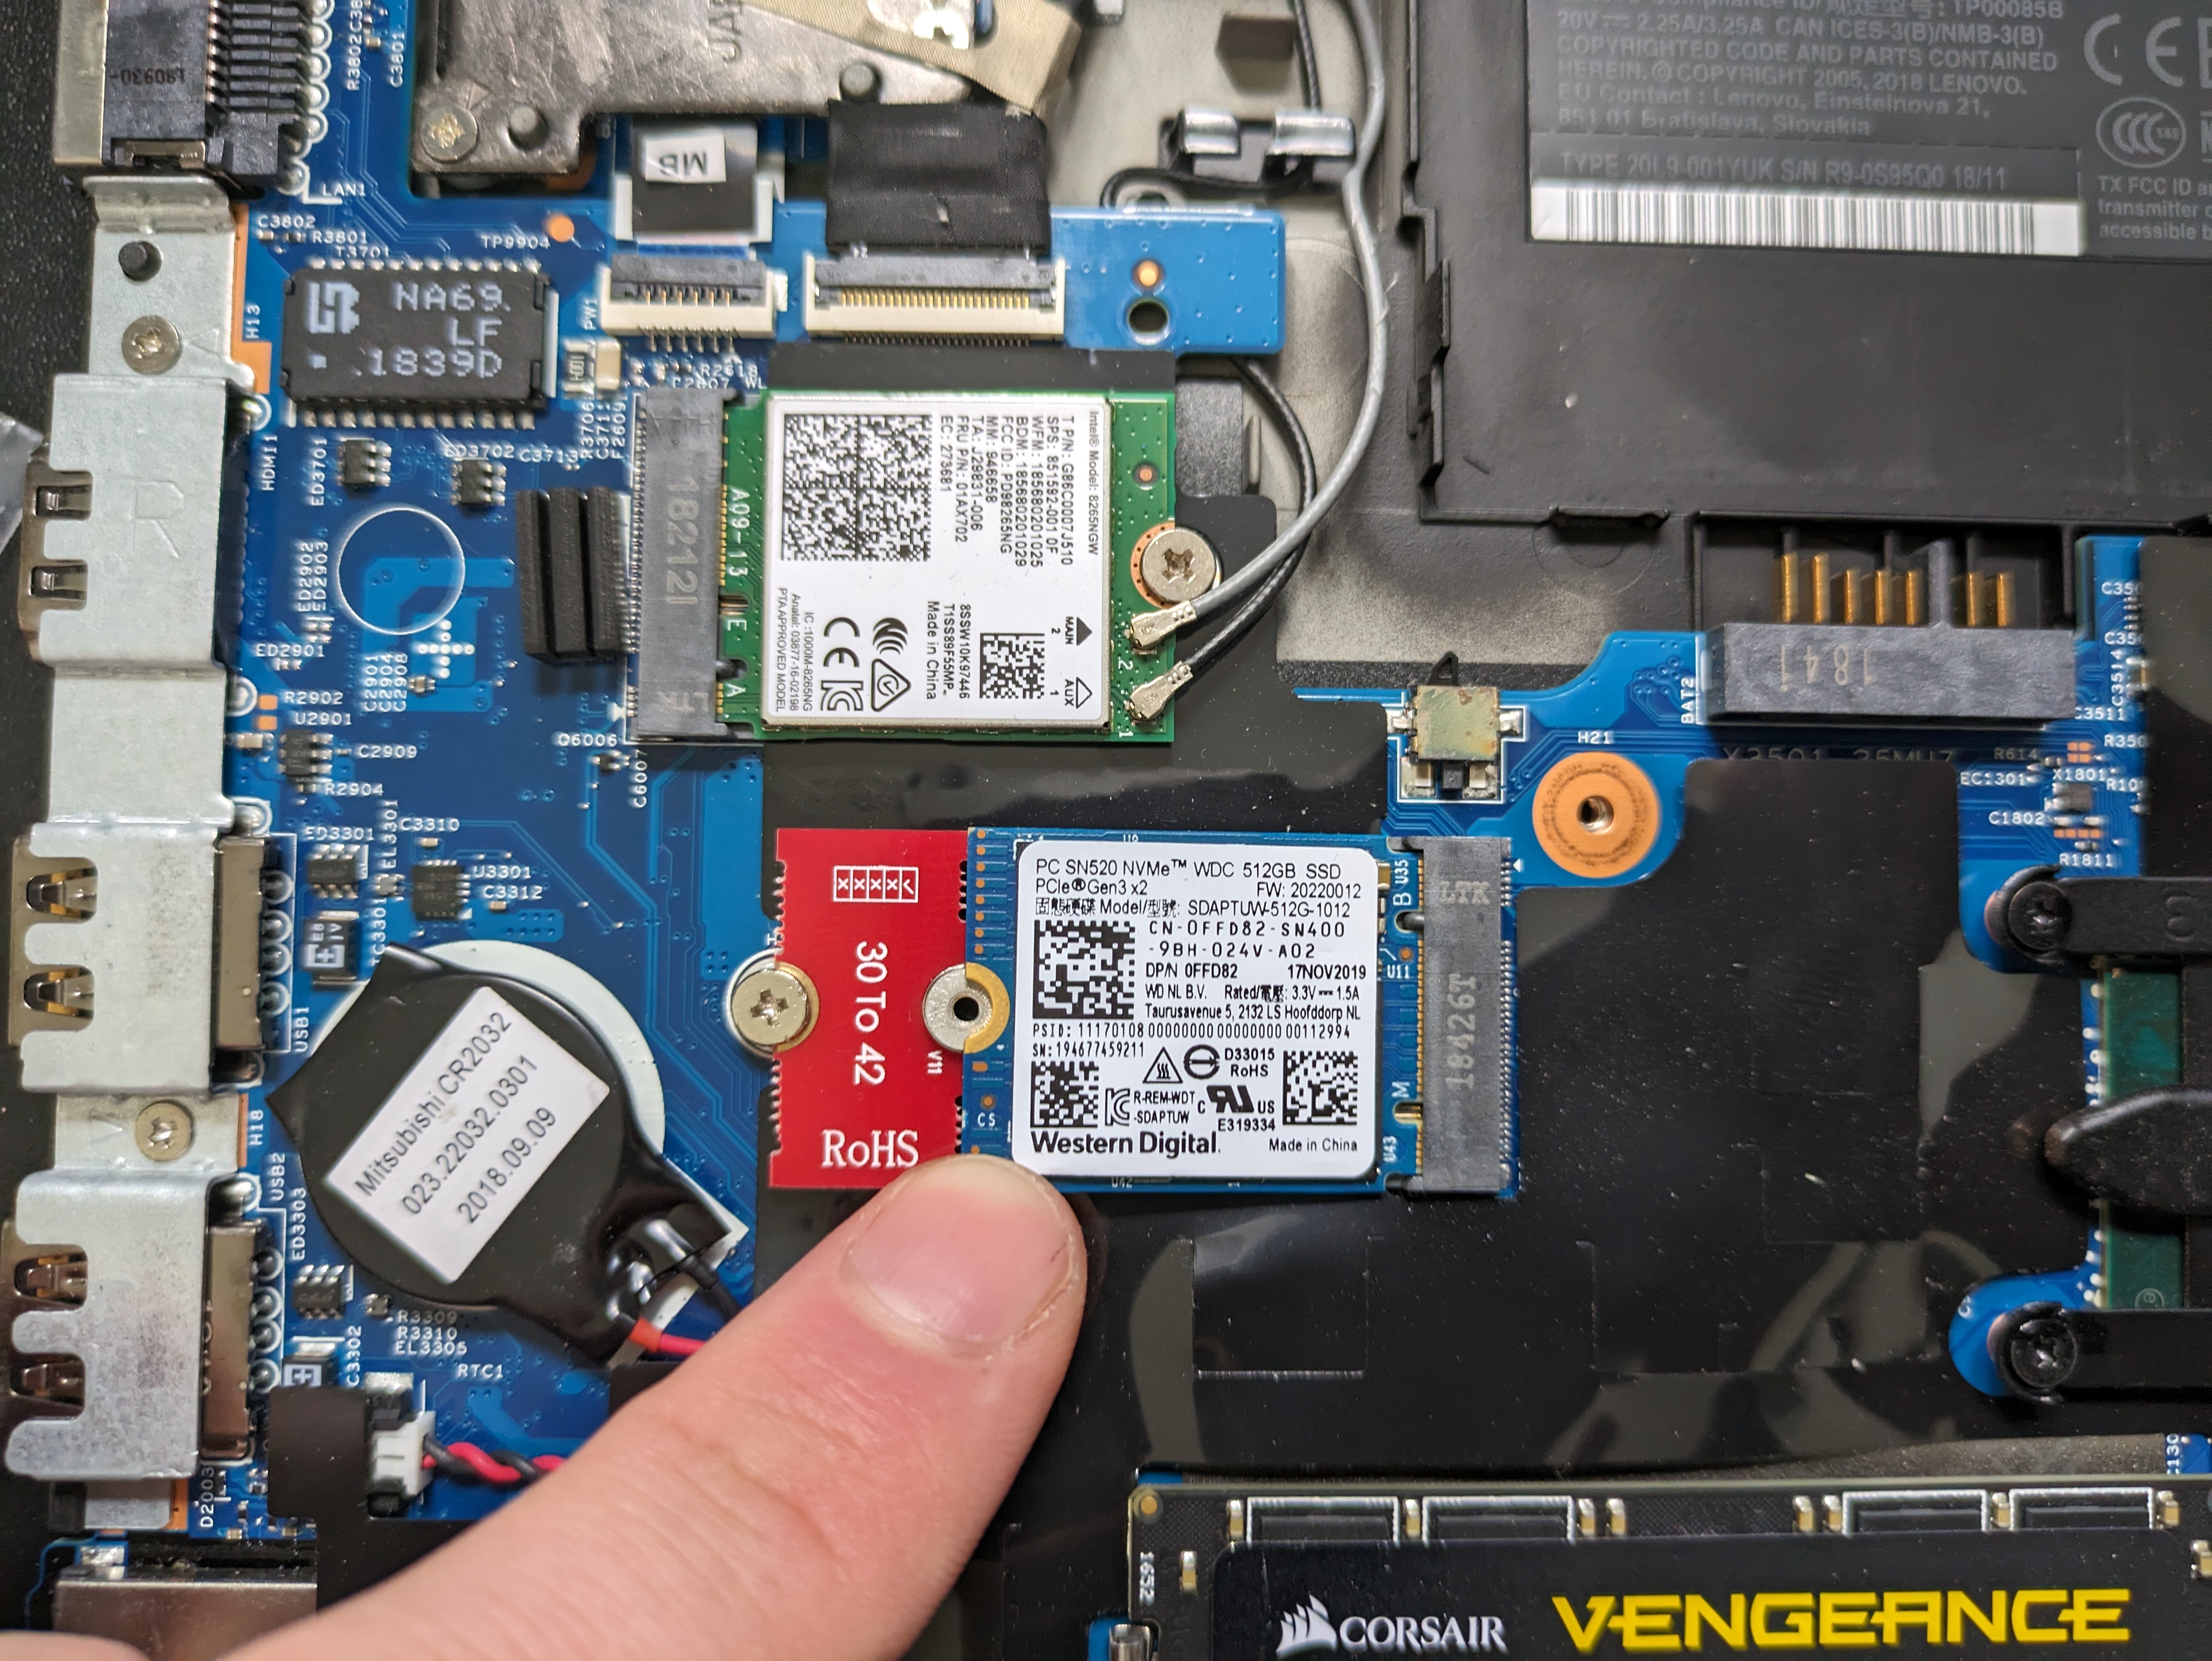
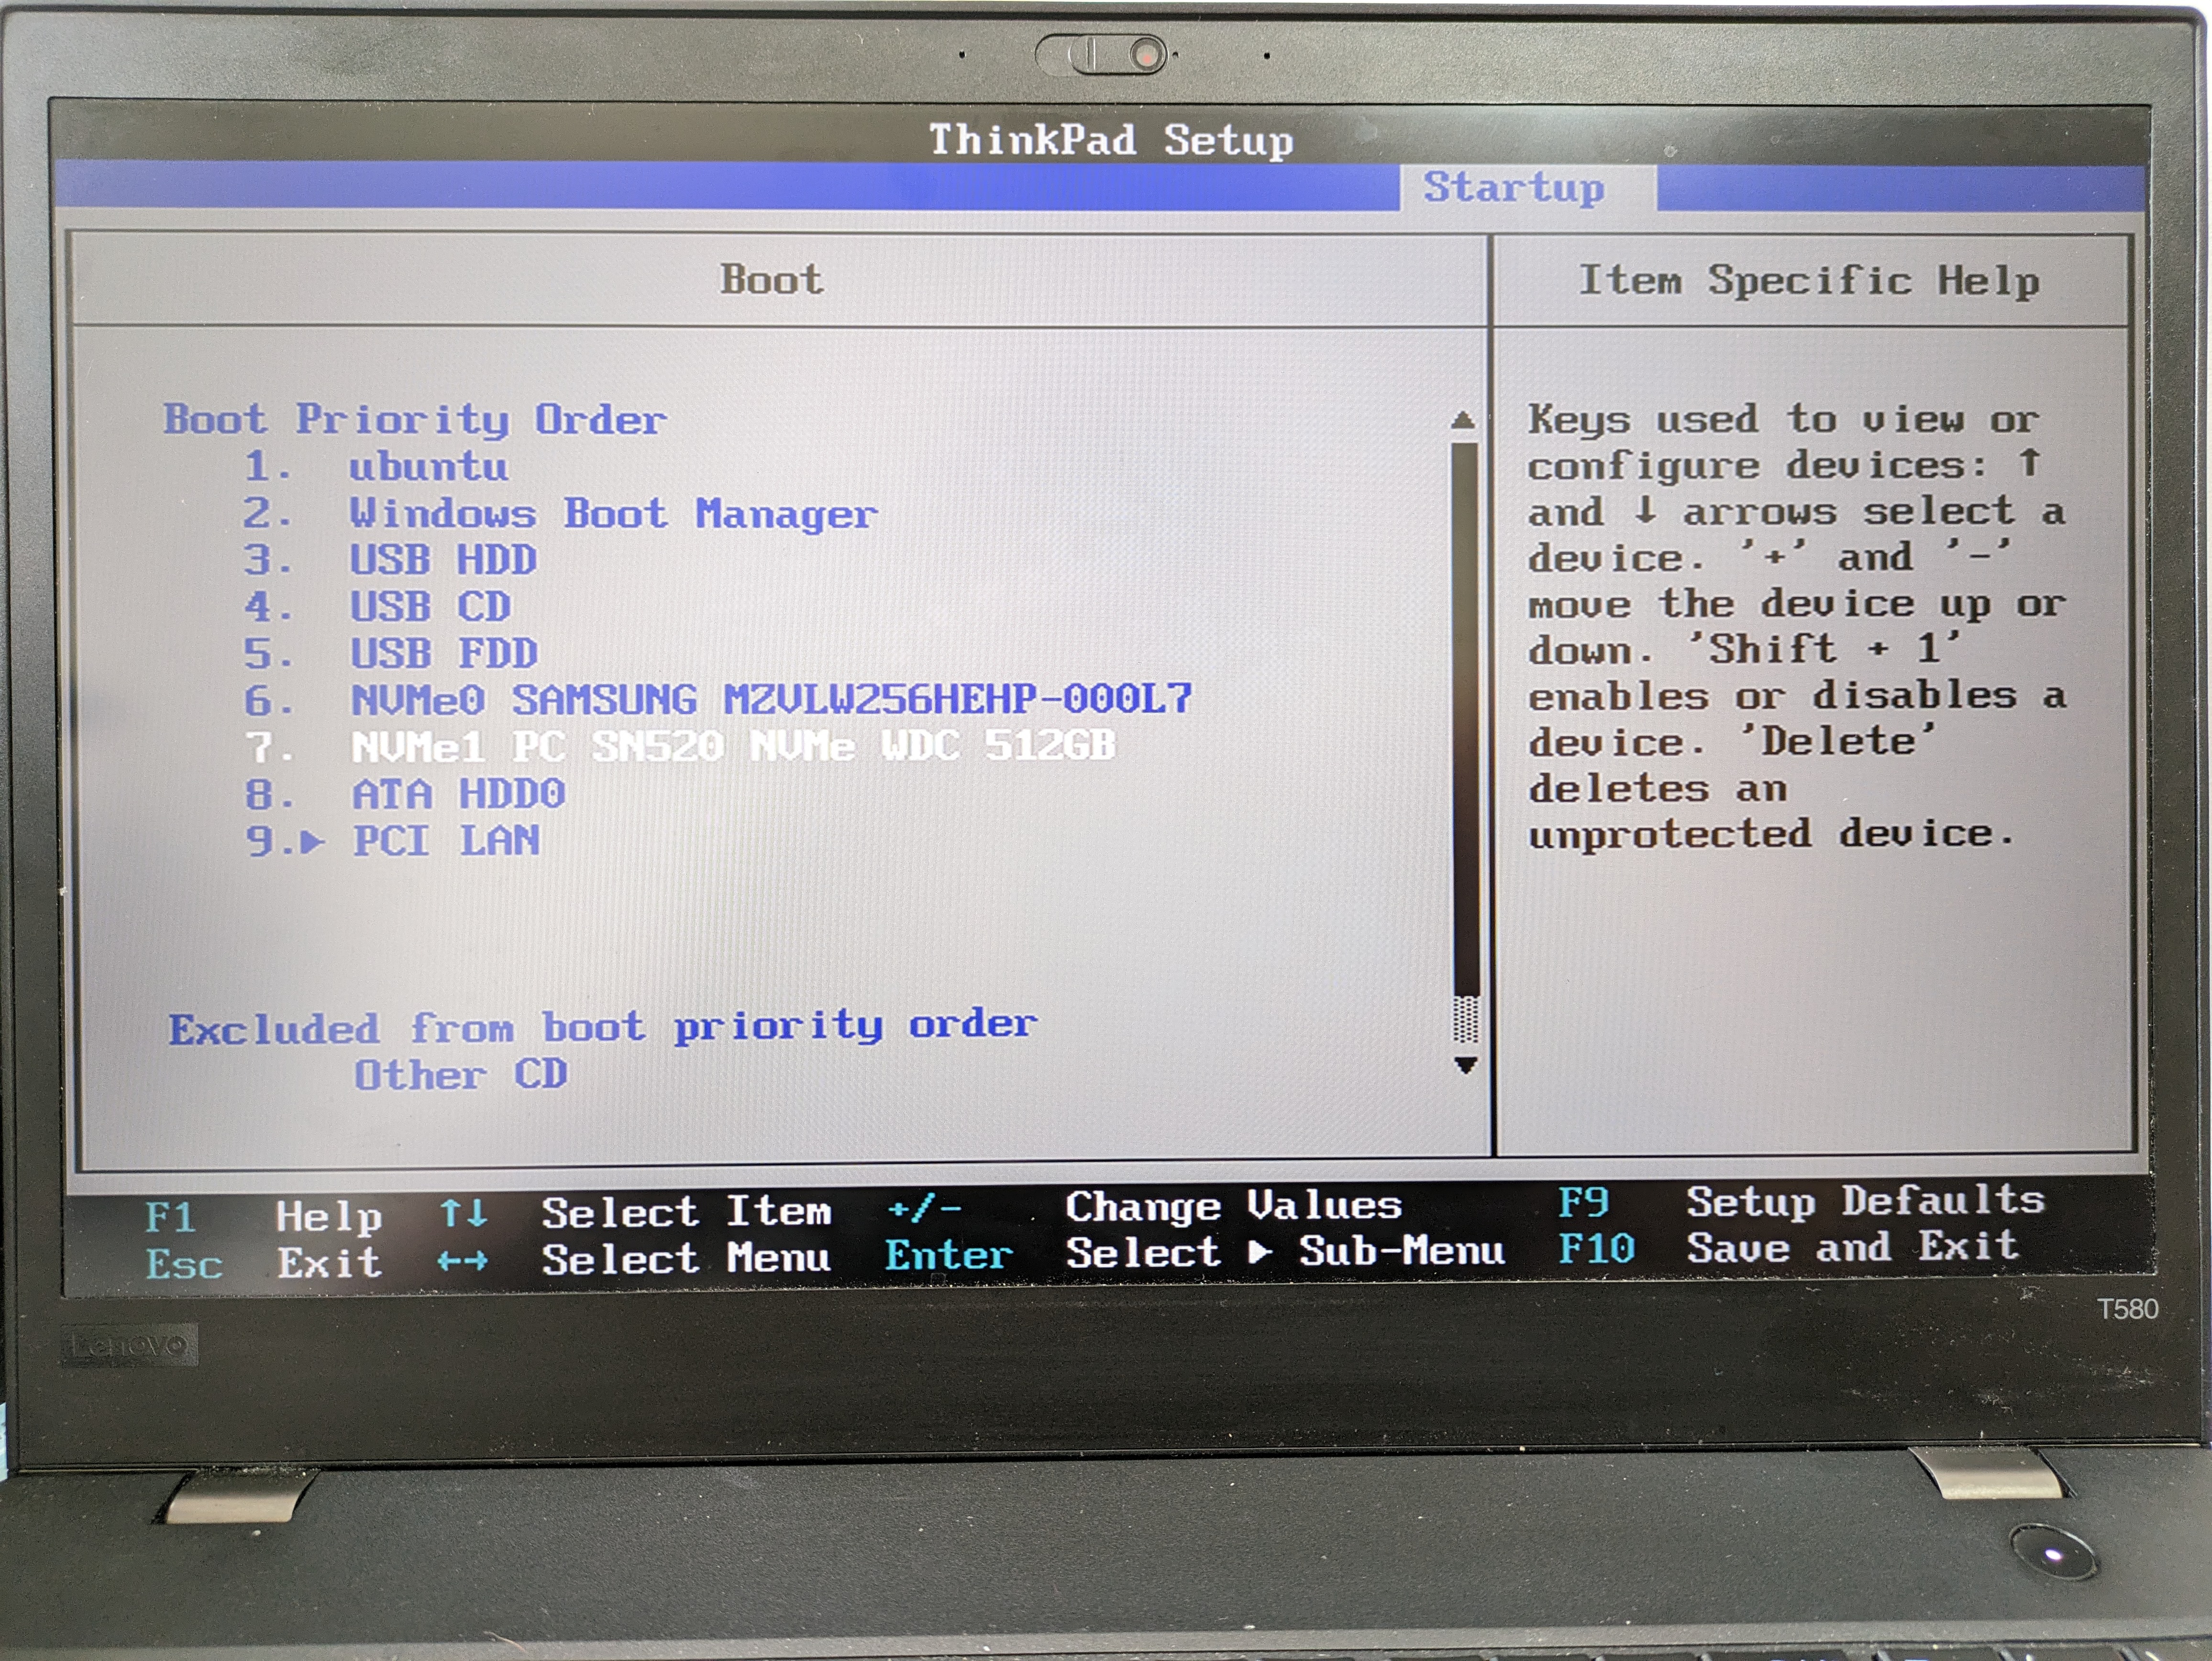
Confirm the second drive is correctly registering in the BIOS. Here you can see the second SN520 NVME is being correctly registered.
Feel free to use the space how you wish, install more software/games in your current OS or install a completely separate OS on the other SSD.